Have you ever rented a storage unit and then … forgot that you were renting a storage unit?
Oops.
Monthly fees add up over time, especially if you haven’t budgeted for them. Suddenly, you realize that you’re paying to store items that you’d forgotten you owned.
You’ve decided that you’re ready to empty your storage unit. Perhaps you’re moving into a bigger space and don’t need to store your belongings anymore. Or, you might have even more items to store, and are in need of an upgrade! Or, you may have won the storage unit in an auction, and you’re eager to see what’s inside.
Regardless, you’re left with one task on your hands: sorting it out. It’s a job that could take hours or days, depending on how you approach it.
To make it easier for you, we’ve put together a few tips to use when cleaning out a storage unit. Roll up your sleeves, put your favorite music on, and buckle up—it’s time to organize.
Approach the Task Strategically
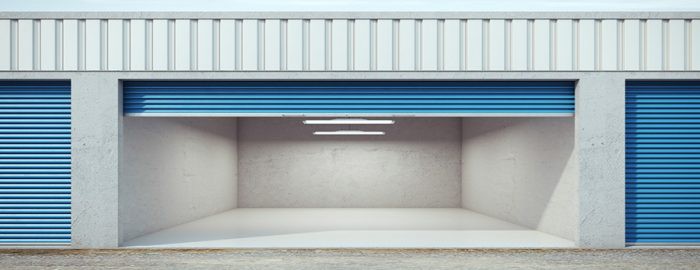
When you open the door to your storage unit and are greeted by a stack of clutter, you may feel completely overwhelmed. How do you even begin such a monumental task?
It starts with restoring order to the chaos. While you declutter, you can apply the classic advice by Marie Kondo and ask: “Does this spark joy?” This question will help you determine what’s worth holding on to, and what might be better off elsewhere.
Start by taking inventory of everything that’s inside the unit. Some of your items may have been there for so long that you hardly recognize them! It might help to write down what you see and get organized on paper first.
When you’re ready, you can place the items in four main piles:
- To sell. These are items that still carry value, but don’t serve a purpose in your life anymore. Try to sell whatever you can—in a way, it means you’re getting paid for your efforts!
- To donate/hand down. Do you know someone in your life who could benefit from a box of sweaters or an old TV? Consider passing along some of your possessions to a friend or family member. Alternatively, you can donate your belongings to organizations that help people in need.
- To throw away. In some cases, it’s best just to toss something. Things that are broken, obsolete, or corroded won’t be of use to someone else. There’s no sense in holding on to them, either! Try to recycle items whenever possible, but in some cases, you’ll simply have to put things in the trash.
- To keep in storage. If you plan to continue using your unit, you can keep items that will remain in it—things that you still don’t have space for and/or that are currently cluttering your home, can be stored.
It’s hard to let go of items with sentimental value, but ask yourself this: will you ever use this item again? Unless it’s a treasured photo album or family heirloom, it might be best to part ways with it.
Pro Tip: Research Local Disposal Guidelines
That old sofa in the back of your unit has seen better days—is it time to get rid of it? If so, you may be wondering how to dispose of large items. The answer will depend on the garbage removal regulations in your area. You may be required to drop large items off at a facility directly.
Before hauling your garbage to the nearest dumpster, do a bit of research to determine where it belongs first.
Set Aside Time Each Day
When you first peek inside your storage unit, you might feel overwhelmed. Even after hours of work, it may seem like the task ahead of you will never end. You don’t want to wake up on moving day and realize that your storage unit is still crammed!
Instead of trying to tackle it all in one day, break up the task over the course of a week. Dedicate a couple of hours in the evening to sorting and then head home for the night. Breaking up this task into manageable blocks of time allows you to enjoy the benefits of organizing, and gives you a sense of control.
Taking things day by day can make the job more manageable for you. It gives your body and your mind a break. If you feel like you’re running out of time, you might get rid of something that you’ll wish you hadn't!
Try to take things slowly to make the process easier on yourself.
Hire a Professional
If you’re short on time (but not on garbage), consider calling for junk removal services. A professional can save you the time and energy of doing the work yourself. It’ll cost more than a DIY solution, but might be worth it depending on the size of your storage unit.
Cleaning
Once your unit is entirely emptied, you’re still left with one thing: dust. A thick layer of it coats the floors and walls of your unit. Most likely, the items you had in the unit are pretty dusty, too.
Fill a bucket with hot, soapy water, and start wiping your belongings with a soft, damp cloth. Next, give the floors a thorough sweep, and go over them using a mop and hot, soapy water.
After your efforts, that musty, stagnant smell will be gone from your items and the unit itself. You can breathe a sigh of relief!
Once you’re done cleaning out your storage unit, you deserve a pat on the back. It’s no easy job, and it takes a lot of hard work to go from a stack of clutter to a cleaned-out unit.
We’re going to leave you with a final bit of advice: consider cleaning your storage unit semi-regularly. Seasonal or bi-annual cleanings will help you stay on top of clutter. By regularly sorting your storage unit, you’ll save yourself from one massive clean-up that you might not have time for!
Now, you’re ready to hang up your old set of keys and move your belongings into your new home (or into the next storage unit). We hope that this guide has helped you get there!